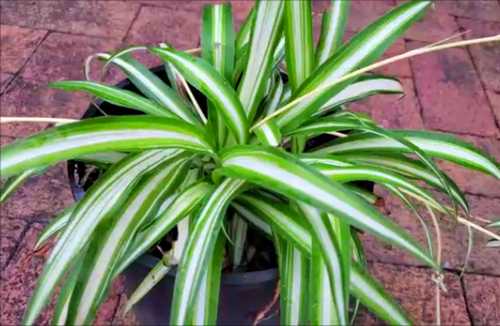
Learn how to grow and propagate spider plant in water, soil and leaves from cuttings and spider babies or pups and by roots division. The spider plant (Chlorophytum comosum) is a beautiful houseplant that cleans toxins from the air (benefits of indoor plants). It is one of the easiest plants to grow without any special requirement. Spider plants, also known as airplane plant, can be grown in pots or in hanging baskets.
Spider Plant Propagation Methods
 |
| Spider Plant |
Spider plants can be propagated through various methods, including stem cuttings, division and babies, pups or plantlets.
Spider Plant Propagation by Division
Division is a straightforward method that works best for mature spider plants.
To propagate spider plant without spiderettes or babies, follow these steps for successful division.
- Tap the pot all around to loosen the soil. Carefully remove the plant from its pot. Gently shake off the excess soil.
- Inspect the plant's roots and cutoff any rotten or dried roots. Identify natural divisions or clusters of leaves.
- Using a clean and sharp knife cut through the rhizome and separate the clusters into individual plants, ensuring each division has its own set of roots and leaves.
- Plant each new division in a separate pot, filled with well-draining potting mix.
- Water thoroughly and place in a well-lit area, away from direct sunlight.
Spider Plant Propagation through Plantlets
 |
| Spider plant propagation from spider babies |
Spider plants naturally produce plantlets, also known as "spiderettes" or babies when the plant is more than 1 year old. These babies can be propagated to create new plants. Follow these steps to propagate spider plantlets:
Locate the spiderettes that have developed roots and are at least two to three inches in length.
- Spider plant propagation can be done simply by planting the spider babies in a pot. You can either cut the babies and grow them. I, however, leave the babies attached to the parent plant until the new plant takes root, then separate it from the parent plant. The spider plant babies will root in water or soil within 4-5 days.
- Gently detach the plantlets from the mother plant by carefully twisting or cutting them off.
- You can propagate them in a paper towel or plant the babies straight into soil.
- To propagate your spider plant using a paper towel, simply enclose the babies on a damp paper towel and seal in a Ziploc bag.
- Fill small pots with well-draining potting mix. Plant each plantlet in an individual pot.
- Water lightly and place the pots in bright shade, away from direct sunlight.
- Ensure the soil remains consistently moist. Excess moisture can cause root rot.
Spider Plant Propagation from Stem Cuttings
Stem cuttings offer another effective way to propagate spider plants. Follow these steps to propagate through stem cuttings:
- Choose a healthy spider plant with long stems.
- Using clean and sharp pruning shears, cut a long stem from the plant at least three to six inches long.
- Remove any lower leaves, leaving only a few at the top.
- Fill a small container with well-draining potting mix. Water thoroughly and place in shade for half an hour to drain excess water.
- Insert the cut end of the stem into the soil, ensuring the lower nodes are covered. No rooting hormone is needed.
- You can plant more than one cuttings in the same pot.
- Place the pot in a clear plastic bag to create a humid environment like a mini green house.
- Position the container in a bright shade area at a warm temperature of around 21-27°C (70-80°F), away from direct sunlight.
- Open the bag occasionally and mist the cutting to maintain humidity.
- After a few weeks, roots should develop, indicating successful propagation.
Propagating spider plants is a rewarding experience that allows you to expand your collection and share the beauty of these charming houseplants with others. Whether you choose division, plantlets, or stem cuttings, each method offers a reliable way to create new spider plant.